

Photo by Nina Mercado on Unsplash
Writing First Unit test in Jasmine
Notes on various terminologies and step by step writing our first test code


NOTE: This is a continuation of Unit Testing-Introduction and Setup for Jasmine
Some Terminologies to understand
Before, we write the first unit test, we have to work on understanding some terminologies and naming conventions. We will be writing the Unit test for the main Logic file. In our case, it would be the Calculator.js file.
Spec file Naming convention
Common file name extensions are : .spec.js and .test.js Spec is an exchangeable word for test when it comes to the file naming conventions. So, the name should be like- (target_filename).spec/test.js or filename.spec/test.ts where the last extension depends on which language we will use. target_filename- This is the name of the source file for which we are writing the test case. So, for us, the test file name would be: calculator.spec.js
Now, we have to define suites in the spec file. What is Suite? -> Suite is a group of tests/specs. It helps us to organize our tests or specs.
Creating our first Suite
We make tests using describe. This is method which is used to create suite.
// test suite->Group of tests
describe('description',function(){
    //specs or tests are written here which we have to run
})
Don't forget to add the spec file in the HTML file to see the output.
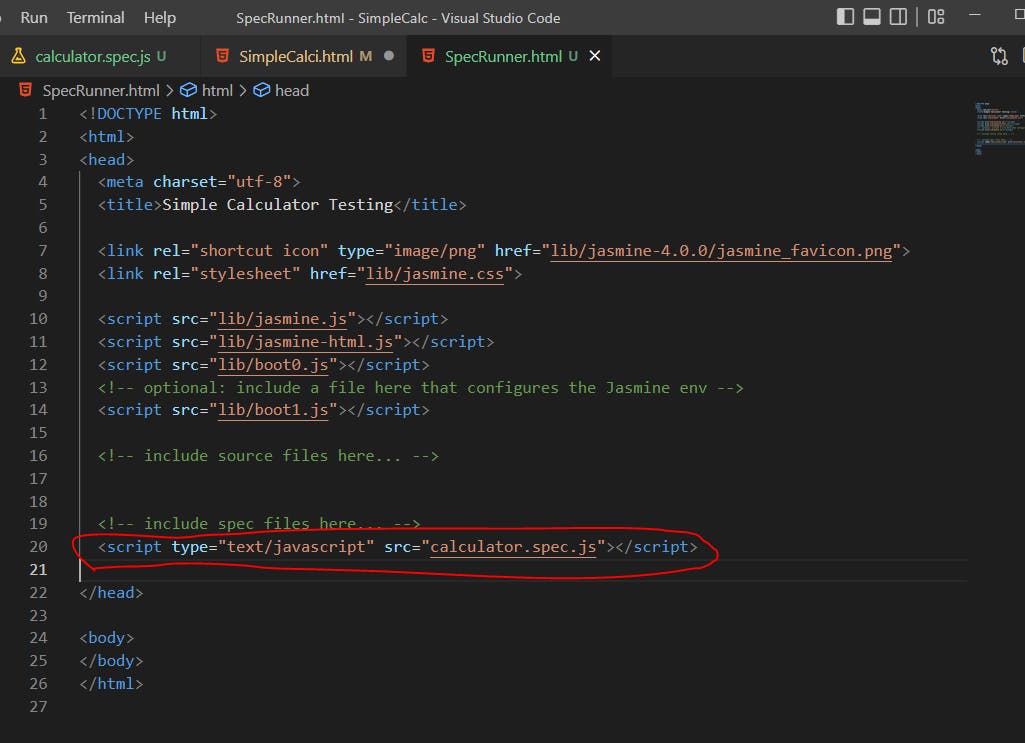
Then run the SpecRunner.html file and it will give you the below error.
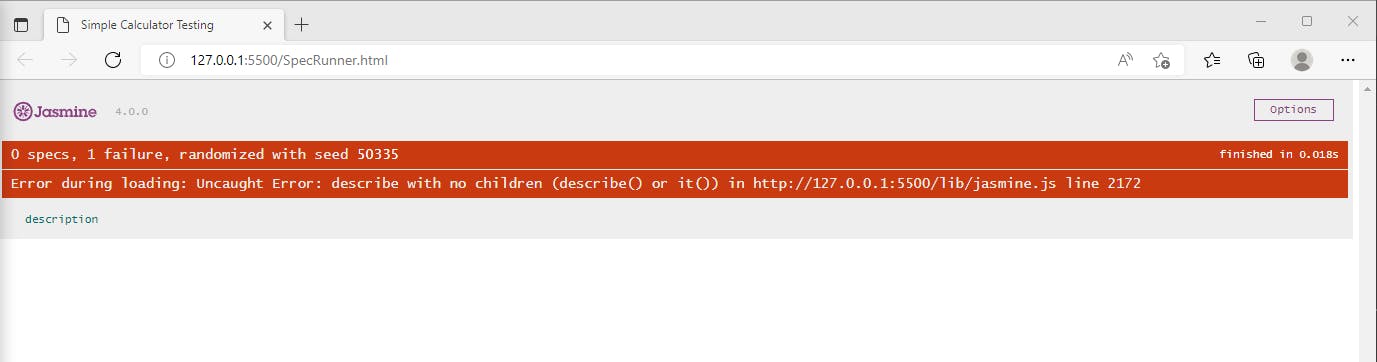 This is because we have not defined anything inside the describe()
Let's write describe() Try the below mentioned code.
// test suite->Group of tests
describe('Calculator.js',function(){
    // Whatever we write in this describe, we will be able to see in the calculator.js
    //specs or tests are written here which we have to run
});
Some more discussion on Spec
In Jasmine, we refer to test as spec loosely. Spec is short form for specification. It is a set or group of expectation that test the state of the code.
spec can be defined using 'it'. It contains two parameter-Title of the spec and the second is the anonymous function in which we write expectation.
// test suite->Group of tests
describe('Calculator.js',function(){
    it('Title of the spec',function(){
        //Expectation
    })
});
Output
calculator.js is the spec/test suite and this tell that the given spec has no expectation followed by the name which we have given for the spec
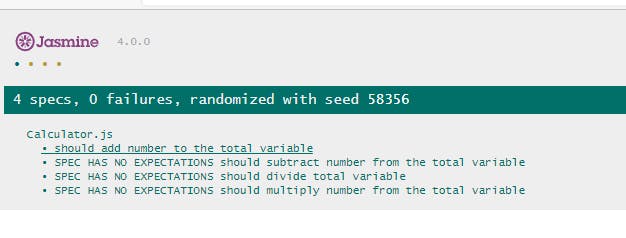
Now, we have to write the test cases of add, subtract, multiply and divide. The title for the test should be relative to whatsoever we write in the test case.
// test suite->Group of tests
describe('Calculator.js',function(){
    it('should add number to the total variable',function(){
        //Expectation
    });
    it('should subtract number from the total variable',function(){
        //Expectation
    });
    it('should multiply number from the total variable',function(){
        //Expectation
    });
    it('should divide total variable',function(){
        //Expectation
    });
});
Output
What is Expectation?
Now, we need to write the Expectations. Expectation is just a statement or an assertion. And, note that the result of this statement should be wither true or false. Thus, it will return a Boolean value. Example: We know 5+5 = 10. So the expectation would be something like: Expect 5+5 to be 10. And the result of this statement is True Expect 5+4 to be 10. But, this should be nine. So the Result of the expectation will be false.
describe('Calculator.js',function(){
    it('should add number to the total variable',function(){
        //Expectation
        //expect 5+5 to be 10
        expect(5+5).toBe(10);//Here toBe is called matcher function
    });
});
Here you could see a small green dots which indicates that one test has passed.
Now, let us start testing Calculator.js. For this, we have to create an instance for the calculator. Before writing the test, don't forget to add the source in the SpecRunner.html file. We will need this to access and create and use calculator function.
//in SpecRunner.html
  <!-- include source files here... -->
  <script type="text/javascript" src="calculator.js"></script>
Sample Test file
describe('Calculator.js',function(){
    it('should add number to the total variable',function(){
        const calculator = new Calculator();
        calculator.add(5);
        //expect total to be 5
        expect(calculator.total).toBe(5);
    });
});
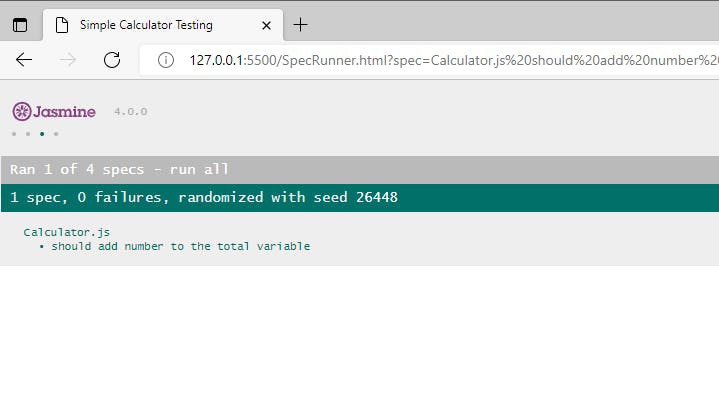
Here, we create and instance of Calculator and then use the add function to carry out the operation. Further, we compare the value using toBe(). It checks whether the value which we get is whether the value 5 or not.
If the expecation or the statement matches, it returns true which means the test case passed, if not the test case fails.
Output
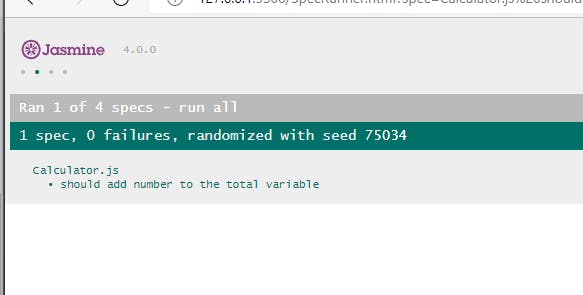
We can see individual tests by clicking on the respective links.
Code for the work done till now: Code
Passing and Failing Specs
When do we say that the Spec has Passed? we know it() is used to define a spec. So, when a spec which has all the expectations passed, then only it is called passed spec. A spec is called when at least one expectation has failed or is false.
Now, let understand with example.
 it('should add number to the total variable',function(){
        const calculator = new Calculator();
        calculator.add(5);
        //expect total to be 5
        expect(calculator.total).toBe(5);
        expect(10).toBe(10);
    });
In the above code snippet, we see that the the spec has two expectation and both will pass. This is called a passed spec.
Now, let us see a failed spec
  it('should add number to the total variable',function(){
        const calculator = new Calculator();
        calculator.add(5);
        //expect total to be 5
        expect(calculator.total).toBe(5);
        expect(10).toBe(9);
    });
 Here, as we see that at least one expectation is failing. Hence, this is a failed spec. Jasmine is powerful, it tells which line and where did we fail, or where we are failing.
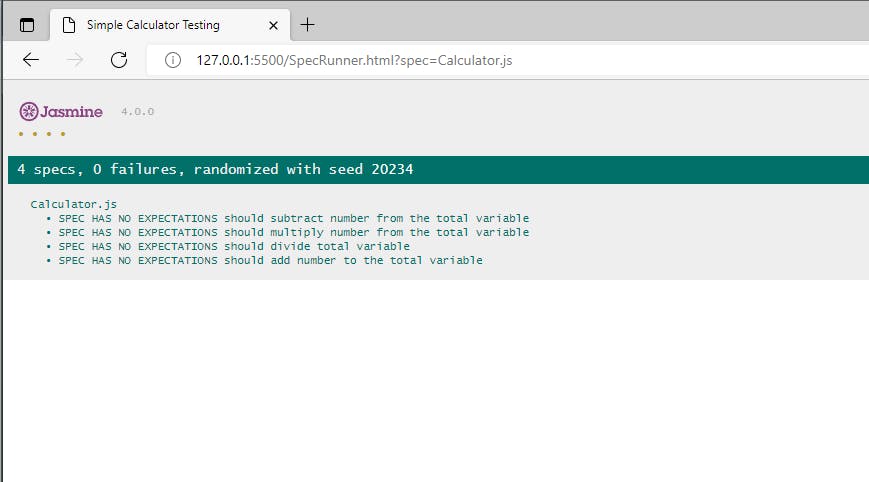
So, we complete writing all the specs.
// test suite->Group of tests
describe('Calculator.js',function(){
    it('should add number to the total variable',function(){
        const calculator = new Calculator();
        calculator.add(5);
        //expect total to be 5
        expect(calculator.total).toBe(5);
        expect(10).toBe(10);
    });
    it('should subtract number from the total variable',function(){
        const calculator = new Calculator();
        calculator.total = 50;
        calculator.subtract(10);
        expect(calculator.total).toBe(40);
    });
    it('should multiply number from the total variable',function(){
        const calculator = new Calculator();
        calculator.total =5;
        calculator.multiply(5);
        expect(calculator.total).toBe(25)

    });
    it('should divide total variable',function(){
        calculator = new Calculator();
        calculator.total=10;
        calculator.divide(2);
        expect(calculator.total).toBe(5);
    });
});
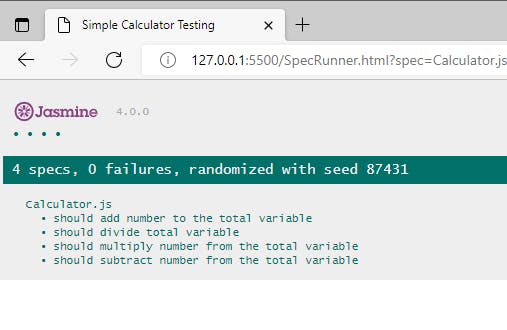
See all the 4 specs are passing and we could go and check each of them individually.
Code Till now: Link NOTE: This is one spec failing to show failing specs.
Disabling Spec and Disabling Suite
Why do we want to disable spec file?
- We might need it when we are making changes in the code and we want to disable the specs until the changes are complete. So, we need disable them temporarily.
- TDD-> Test Driven Development, here we write the tests first and after we write the code and make the test pass. Even in this case, we use disabling spec file.
How could we disable?
Sometimes we want to not want the specs to be executed. We could either comment the whole file or the snippet which we don't want to execute, or if we go insane, we might delete the whole code. Well, we could also disable. So, what are disabled specs? These are the specs which are reported as pending and will not be executed. Even the expectations are false or failed in the disabled spec, it will show it as pending and not as failed failed spec. Okay, now when we write the disabled spec, there will be two cases:
We just have to add an 'x', and it will disable the spec. Example:
// test suite->Group of tests
describe('Calculator.js',function(){
    xit('should add number to the total variable',function(){
        const calculator = new Calculator();
        calculator.add(5);
        //expect total to be 5
        expect(calculator.total).toBe(5);
        expect(10).toBe(19);
    });
To disable the whole suit, just apply 'x' before describe. Example:
xdescribe('Calculator.js',function(){
    it('should add number to the total variable',function(){
        const calculator = new Calculator();
        calculator.add(5);
        //expect total to be 5
        expect(calculator.total).toBe(5);
        expect(10).toBe(19);
    });
//followed by the rest of the code
This would disable the whole suit.
I think this would be enough for this blog.